
Clinician’s Corner – Educational Content for Clinical Directors,
Chief Dental Officers, Clinical Boards and the Entire Clinical Team.
Written by Dr. Mike Miyasaki, Chief Dental Officer, Miyasaki Dental
Sponsored by Vista Apex
Few things in dentistry are more frustrating than seeing a patient added into your busy schedule with the note, ‘Recement crown.’ Personally, I take it to heart and feel like I have failed in some way. When we cement or bond indirect restorations, we hope they will stay forever and to do so we rely on a retentive preparation design and the cement.
In the past decade, the use of zirconia has grown tremendously as an indirect material of choice, but some clinicians have been challenged to keep it in their patient’s mouth. Much of this stems from confusion regarding how we treat zirconia. Do we treat zirconia like the metal it is, or the ceramic it looks like? The answer is you can treat it similarly, but there are some differences that, although slight, lead to long-term success or to that dreaded re-cementation appointment.
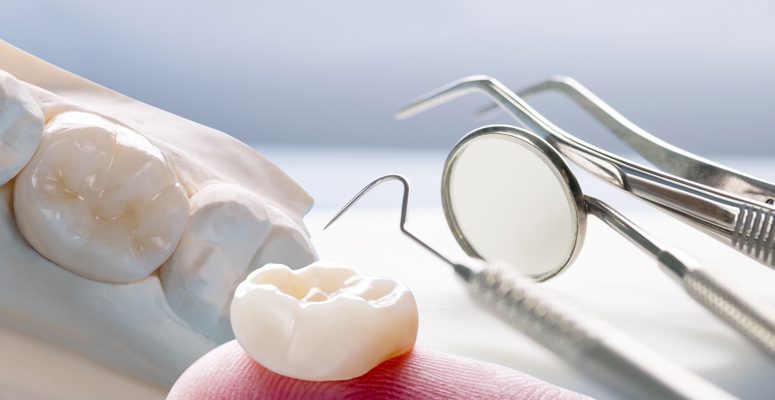
Many times, we are using zirconia in high occlusal wear and short teeth areas. This is always challenging at best. We want the strength, and then to gain retention we seek to have a strong chemical bond to one of the hardest materials we use in dentistry. The problem begins when we try-in the zirconia restoration and it is contaminated by saliva which has phosphates that attach to the intaglio surface of the restoration. This contamination does not allow adhesion to occur with the contaminated surface so, we cannot take full advantage of the chemical bond. But the solution is using a zirconia cleaner and primer from Vista Apex Dental Material (figures 1 and 2). Vista Apex is an innovative dental materials company that makes many products to help increase the clinical success of practitioners like yourself.
 ZR-C was designed as a non-abrasive cleaner to remove the salivary contamination better than any other product on the market today for most restorative materials (ceramic, alumina, metal, and zirconia) (figure 3). It is easy to see, being orange. It is easy to apply, you do not even have to shake the bottle. And after being allowed to dwell on the intaglio surface for 20 seconds, it rinses off quickly.

Figure 1. ZR-C comes in a syringe or bottle for easy dispensing.

Figure 2. ZR-P conveniently comes in a bottle.

Figure 3. Graph showing that there was no phosphate remaining on zirconia samples cleaned with ZR-C.
And ZR-P is a fantastic primer that contains MDP, silane and other proprietary ingredients to maximize the adhesion between the zirconia restoration and luting material, but you can also use it for your ceramic, resin, alumina, and metal restorations. You can then follow your regular cementation or bonding protocols and enjoy more predictable success. Being able to clean and prime all my restorations with these two products makes my life and my assistants’ lives easier, and that is priceless.
The following is a case report to describe the easy step-by-step process.
The zirconia restorations today offer good fitting margins, acceptable aesthetics, and strength (figure 4) making it an almost perfect restorative material. The only shortcoming is sometimes their long-term retention because, unlike a ceramic material, it is too hard to etch.

Figure 4. The zirconia restoration exhibits both acceptable aesthetics and strength.
It is important to check the restoration on the models, if available, before the patient arrives to examine the fit, color, and contours. If there is anything obviously amiss the patient can be rescheduled, and valuable chair time recovered. Once the patient arrives the temporary is removed, and the restoration is tried in and examined for marginal integrity, contours, contacts, and occlusion (figure 5).

Figure 5. The restoration tried on the prepared tooth.
Trying on the restoration typically results in salivary and blood contamination of the intaglio surface (figure 6). This contamination, predominately the salivary phosphates, prevents our adhesives from bonding to the zirconia surface. So, we need to rinse the surface well to remove the contamination and create a more predictable bond with the cement and tooth surface.

Figure 6. The contaminated intaglio surfaces.
Once rinsed, the intaglio surface is dried and examined. It should be free of all saliva, blood, and other tissue (figure 7).

Figure 7. All the contaminants need to be rinsed off.
ZR-C from Vista Apex is available in a bottle or syringe to make its use very convenient. In this case we used the syringe delivery with the brush tips that are included (figure 8). No shaking is needed, and its application is done easily.

Figure 8. ZR-C from Vista Apex is dispensed from a syringe.
ZR-C is orange and easily seen to ensure all the intaglio surface is covered (figure 9). The ZR-C is allowed to dwell on the surface for 20 seconds and then is rinsed off thoroughly, and the surface is dried.

Figure 9. ZR-C is a bright orange color which is easily seen in the restoration.
The next step involves the use of ZR-P, which is a primer containing MDP, silane and other proprietary coupling agents that make ZR-P unique and useful when placing many types of restorative materials. Here two coats of ZR-P are applied (figure 10), and then it is air dried with oil-free air until no movement of any liquid is seen on the surface (figure 11).

Figure 10. Two coats of ZR-P are applied and then dried onto the intaglio surface.

Figure 11. Drying the ZR-P thoroughly with oil-free air
You can then apply an adhesive to the intaglio surface (figure 12), but this must be thinned completely so there is minimal film thickness of the adhesive on the surface that could prevent complete seating of the restoration. The restoration is now ready to be cemented or bonded following the directions of your selected cement or resin.

Figure 12. Apply adhesive to the internal aspect of the restoration, dry, thin carefully and cure.
Once the restoration is in place (figure 13) following the protocol shown here the likelihood of you having those unplanned recementation appointments will diminish.

Figure 13. The zirconia restoration bonded.
We have had to remove some of the zirconia restorations we bonded with this protocol and have found that we had to prepare the zirconia off. The zirconia never separated from the tooth with the vibration and cutting with a bur. This is a different quality of adhesion that will make your days better.
 About the author
Dr. Michael A. Miyasaki is a 1987 graduate of the University of the Southern California School of Dentistry, and has always maintained a practice focusing on comprehensive, minimally-invasive aesthetic restorative dentistry and function. With over 2 decades of clinical and teaching experience, Dr. Miyasaki has established himself as a leading figure in the world of dentistry and continues to educate his peers and patients for the optimal patient experience. His numerous accolades are a testament of his dedication and Sacramento Magazine just announced Miyasaki Dental as a “Top Dentist” and “The Face of Lifetime Dental Health.”
Dr. Michael Miyasaki sits down with the creator of ZR-C™ Universal Cleanser, Alex Johnson, to talk about the product’s creation:
![]()